How to Manage and Optimize Your Flows in Zoho
Introduction
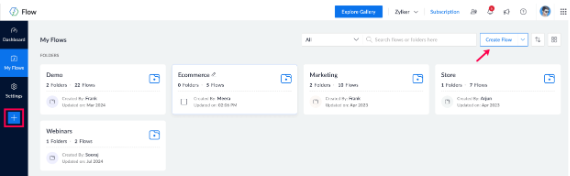
Whether you’re automating tasks or streamlining processes, managing your flows in Zoho Flow is essential to keeping everything running smoothly. The My Flows page is your central hub it’s where you land every time you log in and where all your organization’s flows live.
In this guide, we’ll walk you through how to manage, organize, and optimize your flows effectively so you can stay focused on what matters most.
Step-by-Step Instructions:
1. Create New Flows
To start a new automation:
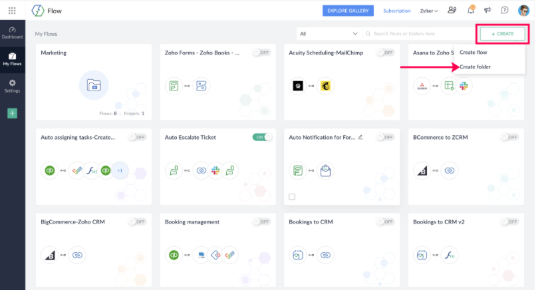
- Click the Create flow button at the top-right corner of the My Flows page.

2. Organize with Folders
Keep things tidy by grouping related flows into folders:
- Click the dropdown next to Create flow and select Create folder.
- Give your folder a name.
- Choose where to place it—under Home (My Flows) or inside another folder.
- Click Create.
3. Find Flows Quickly
Use the Search bar or apply filters to narrow things down:
- All folders – Browse all folders
- All flows – See every flow in your org
- Live – View flows that are currently active
- Paused – See flows that are temporarily turned off
- Draft – Spot flows still in progress
- Owned – View flows you created
- Installed – Flows from the Zoho Flow gallery or marketplace or widgets
- Deprecated – Flows using outdated triggers or actions
4. Turn Flows On or Off
Easily toggle flows on or off using the switch button next to each flow.
Note: Flows with incomplete configurations can’t be turned on.
5. Delete Flows
To remove a flow:
- Hover over the flow until the checkbox appears.
- Select the flow(s) you want to delete.
- Click Delete in the top panel.
🕒 Deleted flows can be recovered within 90 days. To do so:
- Hover over the flowNavigate to Settings>Audit Trail. until the checkbox appears.
- Locate the entry corresponding to the deleted flow.
- Click Restore.
Note: Only the owner or administrators of an organization can restore deleted flows.
6. Duplicate a Flow
Want to experiment without changing the original? Copy it:
- Hover over the flow and select the checkbox.
- Click Copy on the top toolbar.
- Enter a new name for the copy.
- Click Create copy.
Note: You can duplicate one flow at a time.
7. Move Flows to Folders
To keep flows organized:
- Hover over the flow and select the checkbox.
- Click Move in the top toolbar.
- Choose the destination folder.
- Click Move.
8. Explore Flow Details
From the My Flows section, you can click on a flow to view its summary, builder, and history.
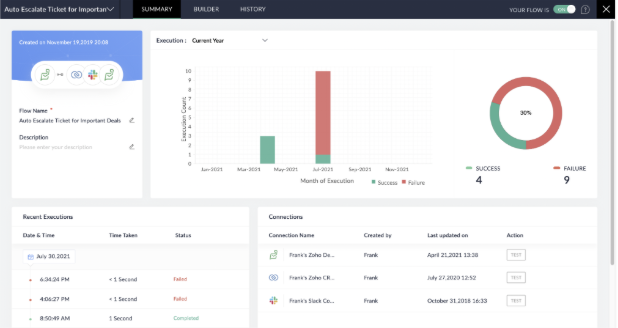
Summary
- Get an overview of execution history and connected apps.
- See recent executions displayed graphically.
- Manage connections test, reconnect, or delete them.
- To rename a flow or update its description, hover near the field and click the edit icon.
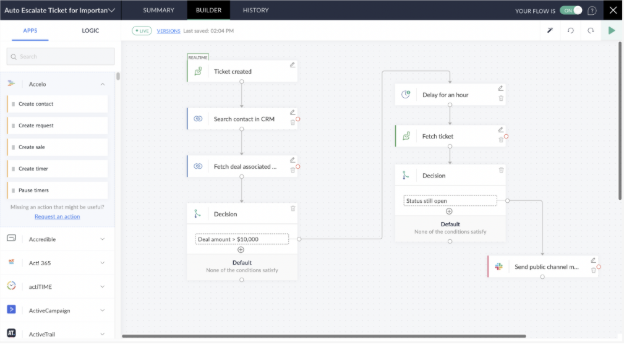
Builder
- This is your workspace to create and edit flows.
- Use builder tools in the top-right corner for a smoother experience.
- Use the slide switch to turn the flow on/off.
Flows must be ON to detect trigger events, but turning them OFF won’t affect past executions.
Slide switch
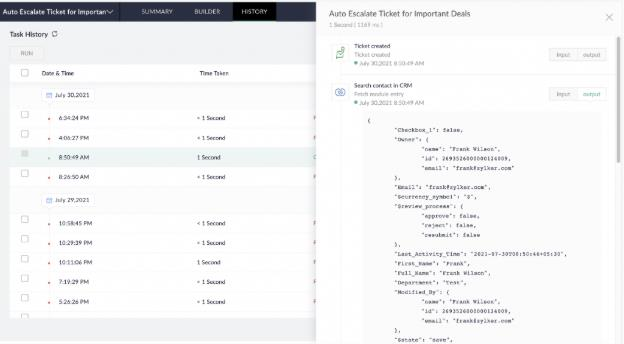
History
- View detailed logs of each flow execution.
- Click an execution to explore more.
- Use filters to refine the history by status or date.
Tips
- Use folders early on to keep flows organized—it makes managing them easier as your list grows.
- Duplicate before editing if you're unsure about making changes to a live flow.
- Regularly check the history tab to monitor flow performance and troubleshoot issues.
- Pause unused flows to reduce clutter and processing overhead without deleting them.
