How to Add User in Zoho One?
Introduction
Zoho One allows administrators to seamlessly add and manage users – such as employees or lite users – within the organization. Once added, users can be assigned applications, configured with security policies, roles, and access controls, and monitored through device management tools.
To onboard multiple users efficiently, options are available to import users or sync directly from Active Directory.
Step-by-Step Instructions:
Prerequisites
To add users, one of the following is required:
- Organization Owner
- Organization Admin
- A Custom Role with the “Add Users” permission
How to Add a User
Via Web Application
- Sign in to Zoho One.
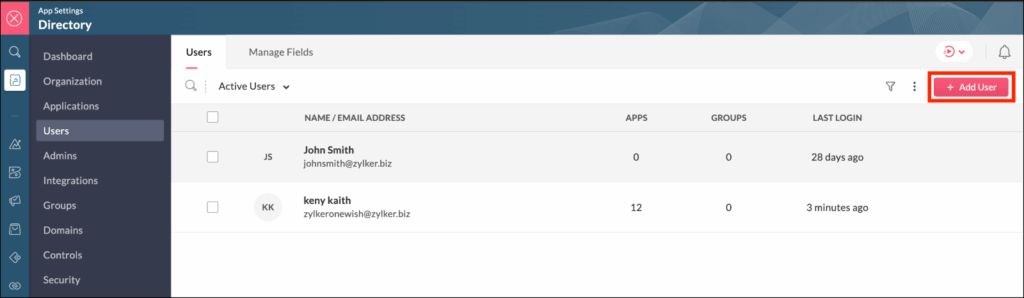
- Navigate to Directory from the left-hand menu.
- Select Users, then click Add User.
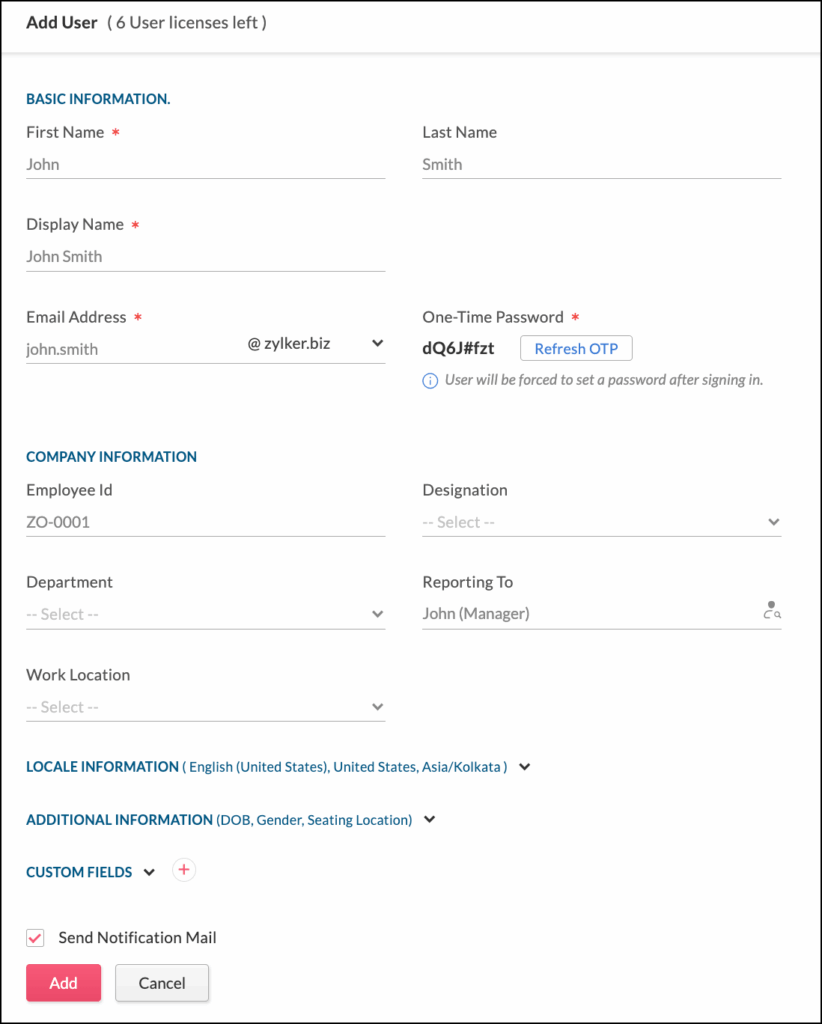
Basic Information
a)Enter First Name, Last Name, and Display Name.
b)In the Email Address field:
- If your domain is verified, enter the domain-based email address. The user will be added directly, and a mailbox will be created automatically if mail hosting is enabled.
- If no domain is configured, enter the user's personal or business email address. An invitation will be sent for them to join.
Note:
c) Invitations are valid for 7 days.
d) They can be resent up to 3 times.
e) After the limit is reached, contact [email protected] for assistance.
5. Company Information
Enter details such as Employee ID, Designation, Department, Reporting Manager, and Work Location.
6. Locale Information
Select the Language, Country, and Time Zone. These fields are automatically filled based on the selected Work Location.
7. Additional Information
Include Date of Birth, Gender, Date of Joining, and Seating Location.
If custom fields are already set up, fill in the required values. You may also create new custom fields at this stage.
To share login credentials manually rather than via email, uncheck Send Notification Mail.
Click Add to complete the process.
Via Mobile Application
iOS Devices
- Open the Zoho One app.
- Tap Directory at the bottom right, then select User.
- Tap the Add icon in the top-right corner.
- Provide First Name, Last Name, and Email Address.
- Domain-based emails will allow direct addition.
- External addresses will require user acceptance via invitation.
- Enter Employee ID, Reporting Manager, and Work Location.
- Fill in any existing custom fields.
- Disable the notification email if you prefer to send credentials manually.
- Tap Add to confirm.
Android Devices
- Launch the Zoho One app.
- Tap the Menu at the bottom right, then select Users.
- Tap the Add icon.
- Fill in:
- First Name and Last Name
- Email Address (use domain-based if available)
- Set a password manually or choose Auto Generate Password
- Complete Work Info with Employee ID, Designation, Department, Reporting Manager, and Work Location.
- Add any relevant custom fields.
- Uncheck Send Notification Mail if you wish to deliver credentials manually.
- Tap Add in the top-right corner to proceed.
After Adding a User
- Users with existing email addresses will receive an invitation and appear as Pending until they accept and sign in.
- Users with domain-based addresses will be added immediately and listed as Not Joined Yet until they first sign in.
- Users already associated with another Zoho One organization or Zoho applications (e.g. Mail, Cliq, Vault, etc.) will be marked as External Users.

- On mobile, users whose email domain is not verified will remain in Invited status until they accept and log in.